In this article, I am gonna show how to change the username and hostname color in Kali Linux 2020.1, because in new Kali Linux by default standers username and hostname in the terminal is colored form but if we login in root account both root and hostname change in a simple color, so how to change it I will explain here how to make root user terminal colorful in Kali Linux.
Make root User Terminal colorful in Kali Linux
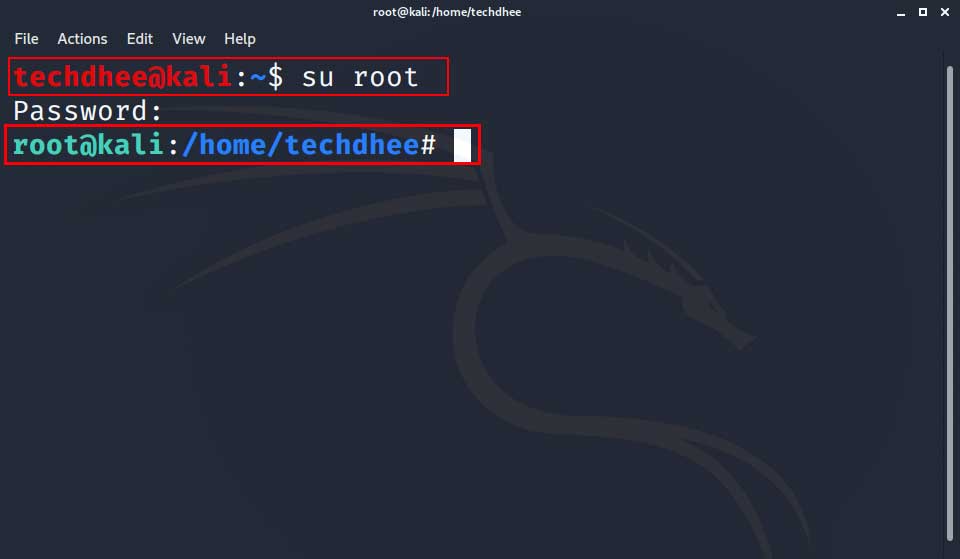
First of all, you have to login as a root user in Kali Linux. You have to set the root password in then you can login in as root in Kali Linux. If you don’t know how to do this please go to this article where I show how to set the root password and how to log in as root.
Video:- How To Get root Access
How To Get root Access && root Account Login into Kali Linux 2020.1
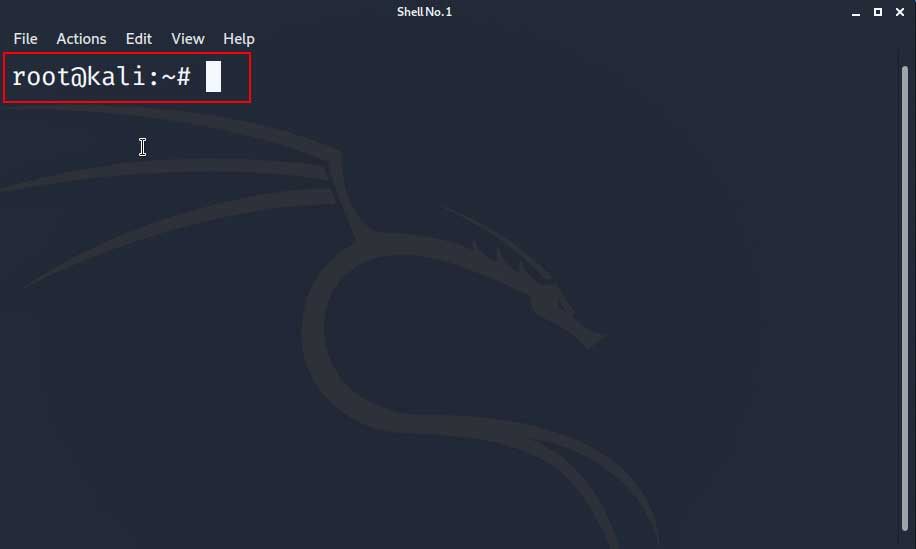
Login as root
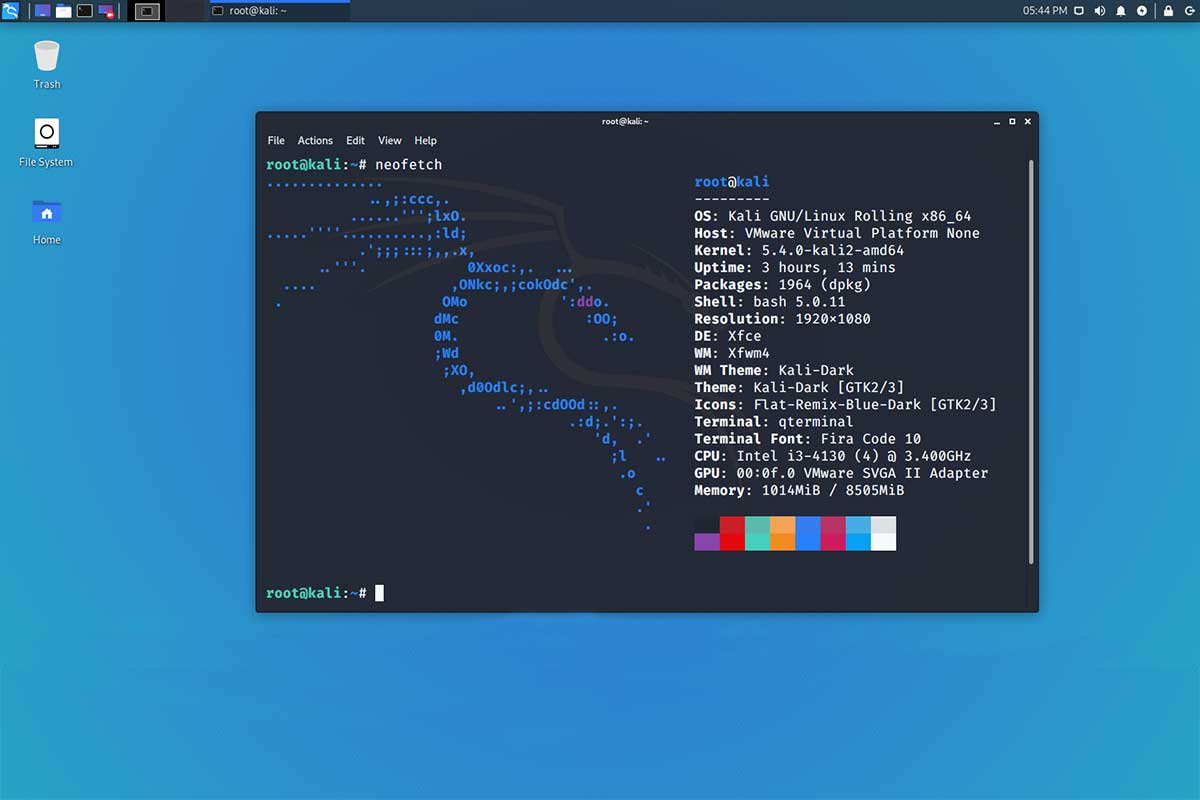
Open root terminal
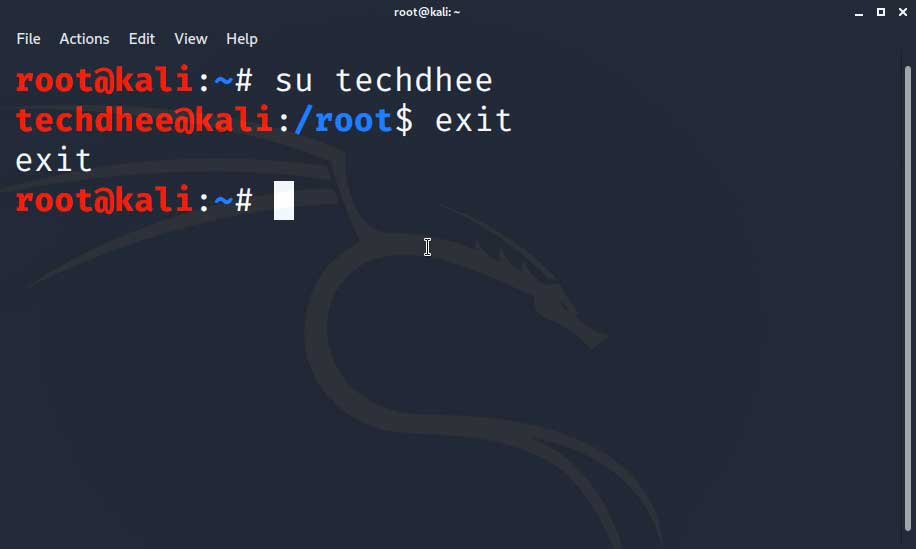
When you open the terminal, terminal “root@kali:~#” with simple white color.
Check the difference between default user
Now you can switch the user to check the difference between both of them, using su <username>. Here you have to check the difference between default users is with color and root users not.

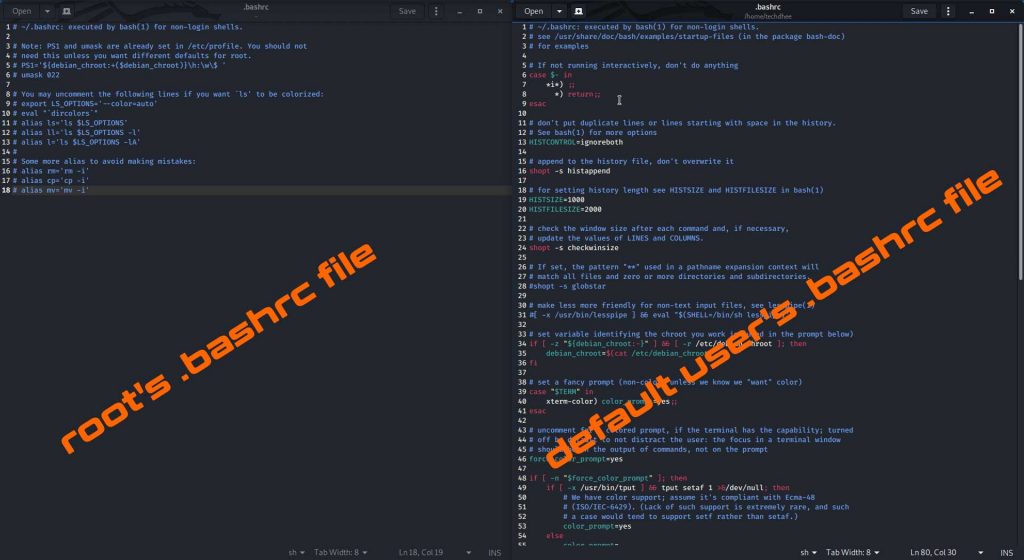
Open the .bashrc file
Open the .bashrc file , Here we have to open the both users .bashrc file to make change
#gedit ~/.bashrc command for root's .bashrc file

#gedit /hoem/username/.bashrc for default user's .bashrc file
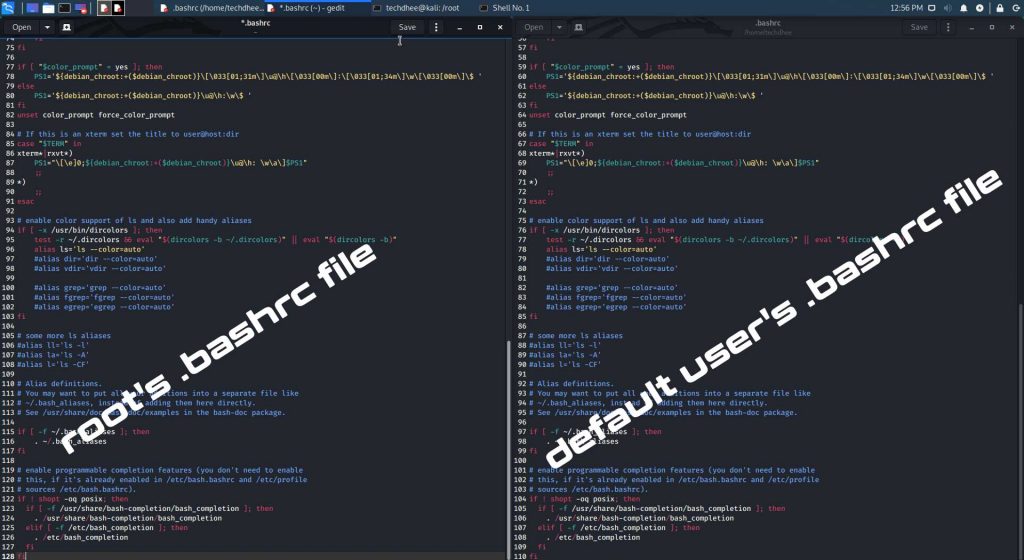
Copy the .bashrc file
Now final and important step is we have to copy the default user’s .bashrc file text to root’s .bashrc file and save the root’s .bashrc file.
default user’s .bashrc file demo
The following code lines are default user’s .bashrc file code.
# ~/.bashrc: executed by bash(1) for non-login shells.
# see /usr/share/doc/bash/examples/startup-files (in the package bash-doc)
# for examples

# If not running interactively, don't do anything
case $- in
*i*) ;;
*) return;;
esac

# don't put duplicate lines or lines starting with space in the history.
# See bash(1) for more options
HISTCONTROL=ignoreboth

# append to the history file, don't overwrite it
shopt -s histappend

# for setting history length see HISTSIZE and HISTFILESIZE in bash(1)
HISTSIZE=1000
HISTFILESIZE=2000

# check the window size after each command and, if necessary,
# update the values of LINES and COLUMNS.
shopt -s checkwinsize

# If set, the pattern "**" used in a pathname expansion context will
# match all files and zero or more directories and subdirectories.
#shopt -s globstar

# make less more friendly for non-text input files, see lesspipe(1)
#[ -x /usr/bin/lesspipe ] && eval "$(SHELL=/bin/sh lesspipe)"

# set variable identifying the chroot you work in (used in the prompt below)
if [ -z "${debian_chroot:-}" ] && [ -r /etc/debian_chroot ]; then
debian_chroot=$(cat /etc/debian_chroot)
fi

# set a fancy prompt (non-color, unless we know we "want" color)
case "$TERM" in
xterm-color) color_prompt=yes;;
esac

# uncomment for a colored prompt, if the terminal has the capability; turned
# off by default to not distract the user: the focus in a terminal window
# should be on the output of commands, not on the prompt
force_color_prompt=yes

if [ -n "$force_color_prompt" ]; then
if [ -x /usr/bin/tput ] && tput setaf 1 >&/dev/null; then
# We have color support; assume it's compliant with Ecma-48
# (ISO/IEC-6429). (Lack of such support is extremely rare, and such
# a case would tend to support setf rather than setaf.)
color_prompt=yes
else
color_prompt=
fi
fi

if [ "$color_prompt" = yes ]; then
PS1='${debian_chroot:+($debian_chroot)}\[\033[01;31m\]\u@\h\[\033[00m\]:\[\033[01;34m\]\w\[\033[00m\]\$ '
else
PS1='${debian_chroot:+($debian_chroot)}\u@\h:\w\$ '
fi
unset color_prompt force_color_prompt

# If this is an xterm set the title to user@host:dir
case "$TERM" in
xterm*|rxvt*)
PS1="\[\e]0;${debian_chroot:+($debian_chroot)}\u@\h: \w\a\]$PS1"
;;
*)
;;
esac

# enable color support of ls and also add handy aliases
if [ -x /usr/bin/dircolors ]; then
test -r ~/.dircolors && eval "$(dircolors -b ~/.dircolors)" || eval "$(dircolors -b)"
alias ls='ls --color=auto'
#alias dir='dir --color=auto'
#alias vdir='vdir --color=auto'

#alias grep='grep --color=auto'
#alias fgrep='fgrep --color=auto'
#alias egrep='egrep --color=auto'
fi

# some more ls aliases
#alias ll='ls -l'
#alias la='ls -A'
#alias l='ls -CF'

# Alias definitions.
# You may want to put all your additions into a separate file like
# ~/.bash_aliases, instead of adding them here directly.
# See /usr/share/doc/bash-doc/examples in the bash-doc package.

if [ -f ~/.bash_aliases ]; then
. ~/.bash_aliases
fi

# enable programmable completion features (you don't need to enable
# this, if it's already enabled in /etc/bash.bashrc and /etc/profile
# sources /etc/bash.bashrc).
if ! shopt -oq posix; then
if [ -f /usr/share/bash-completion/bash_completion ]; then
. /usr/share/bash-completion/bash_completion
elif [ -f /etc/bash_completion ]; then
. /etc/bash_completion
fi
fi
Open the root terminal
Now close all the terminal and open the terminal and you will see colorful terminal same like default one.
Change the color
You can change the default color also doing some change. There is some ANSI color code which is showing below you can set according to yours. Default code is
if [ "$color_prompt" = yes ]; then PS1='${debian_chroot:+($debian_chroot)}\[\033[01;31m\]\u@\h\[\033[00m\]:\[\033[01;34m\]\w\[\033[00m\]\$ '
ANSI color codes:
# Reset
Color_Off="\[\033[0m\]" # Text Reset

# Regular Colors
Black="\[\033[0;30m\]"  # Black
Red="\[\033[0;31m\]"    # Red
Green="\[\033[0;32m\]"  # Green
Yellow="\[\033[0;33m\]" # Yellow
Blue="\[\033[0;34m\]"   # Blue
Purple="\[\033[0;35m\]" # Purple
Cyan="\[\033[0;36m\]"   # Cyan
White="\[\033[0;37m\]"  # White

# Bold
BBlack="\[\033[1;30m\]"  # Black
BRed="\[\033[1;31m\]"    # Red
BGreen="\[\033[1;32m\]"  # Green
BYellow="\[\033[1;33m\]" # Yellow
BBlue="\[\033[1;34m\]"   # Blue
BPurple="\[\033[1;35m\]" # Purple
BCyan="\[\033[1;36m\]"   # Cyan
BWhite="\[\033[1;37m\]"  # White

# Underline
UBlack="\[\033[4;30m\]"  # Black
URed="\[\033[4;31m\]"    # Red
UGreen="\[\033[4;32m\]"  # Green
UYellow="\[\033[4;33m\]" # Yellow
UBlue="\[\033[4;34m\]"   # Blue
UPurple="\[\033[4;35m\]" # Purple
UCyan="\[\033[4;36m\]"   # Cyan
UWhite="\[\033[4;37m\]"  # White

# Background
On_Black="\[\033[40m\]"  # Black
On_Red="\[\033[41m\]"    # Red
On_Green="\[\033[42m\]"  # Green
On_Yellow="\[\033[43m\]" # Yellow
On_Blue="\[\033[44m\]"   # Blue
On_Purple="\[\033[45m\]" # Purple
On_Cyan="\[\033[46m\]"   # Cyan
On_White="\[\033[47m\]"  # White

# High Intensty
IBlack="\[\033[0;90m\]"  # Black
IRed="\[\033[0;91m\]"    # Red
IGreen="\[\033[0;92m\]"  # Green
IYellow="\[\033[0;93m\]" # Yellow
IBlue="\[\033[0;94m\]"   # Blue
IPurple="\[\033[0;95m\]" # Purple
ICyan="\[\033[0;96m\]"   # Cyan
IWhite="\[\033[0;97m\]"  # White

# Bold High Intensty
BIBlack="\[\033[1;90m\]"  # Black
BIRed="\[\033[1;91m\]"    # Red
BIGreen="\[\033[1;92m\]"  # Green
BIYellow="\[\033[1;93m\]" # Yellow
BIBlue="\[\033[1;94m\]"   # Blue
BIPurple="\[\033[1;95m\]" # Purple
BICyan="\[\033[1;96m\]"   # Cyan
BIWhite="\[\033[1;97m\]"  # White

# High Intensty backgrounds
On_IBlack="\[\033[0;100m\]"  # Black
On_IRed="\[\033[0;101m\]"    # Red
On_IGreen="\[\033[0;102m\]"  # Green
On_IYellow="\[\033[0;103m\]" # Yellow
On_IBlue="\[\033[0;104m\]"   # Blue
On_IPurple="\[\033[10;95m\]" # Purple
On_ICyan="\[\033[0;106m\]"   # Cyan
On_IWhite="\[\033[0;107m\]"  # White

# Various variables you might want for your PS1 prompt instead
Time12h="\T"
Time12a="\@"
PathShort="\w"
PathFull="\W"
NewLine="\n"
Jobs="\j"
Change the code
f [ "$color_prompt" = yes ]; then
PS1='${debian_chroot:+($debian_chroot)}\[\033[01;32m\]\u@\h\[\033[00m\]:\[\033[01;34m\]\w\[\033[00m\]\$
Video
Important Things To Remember:
The author of this article does not promote any illegal activities It is just for education purpose All the activities provided in this article, YouTube channel, and the website techdhee.in are only for educational purposes.
If you are using and follow this tutorial for any illegal purpose, techdhee.in can not be responsible for your action.
My purpose is to educate or share the information who have not, how to secure your self from the Internet, and the world of digital.
Also, read the Disclaimer
Finally
Thank you for reading this post and keep connected to TECH DHEE to continue enjoying excellent posts. Share your views about this post in the comment section below. If you still have any queries, throw it in the comment section. If you find this post helpful, don’t hesitate to share this post on your social network. It will only take a moment, and also it is quite easy and useful for others.